

Getting started with the E-ticket module!
With the e-ticket module, you can easily create, send, and scan digital tickets. An e-ticket is linked to a reservation and contains a unique QR code that can be used once to confirm attendance.
E-tickets are ideal for situations that require fast and mobile operation — for example, during courses, boat rentals, or events. By scanning the QR code, a reservation is instantly validated, without the need for a computer.
This guide shows you how to create, send, and manage e-tickets.
To use the module correctly, several settings need to be configured properly first.
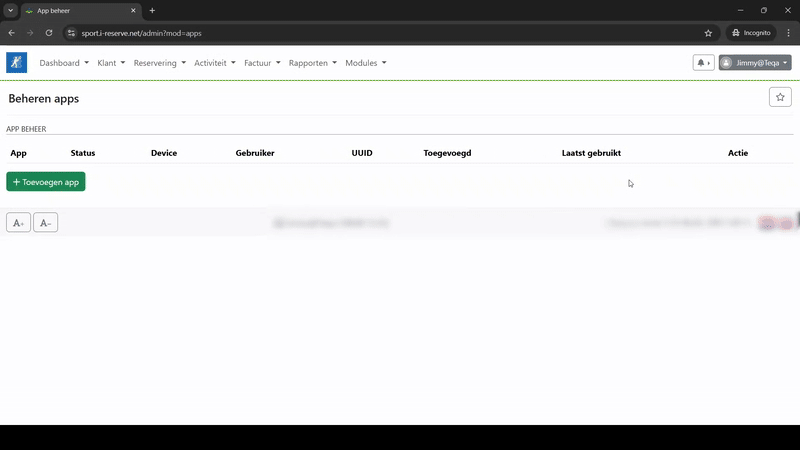
Check if the e-ticket module is activated
Before you can get started, we need to check if the E-ticket module is active. You can do this by following these steps:
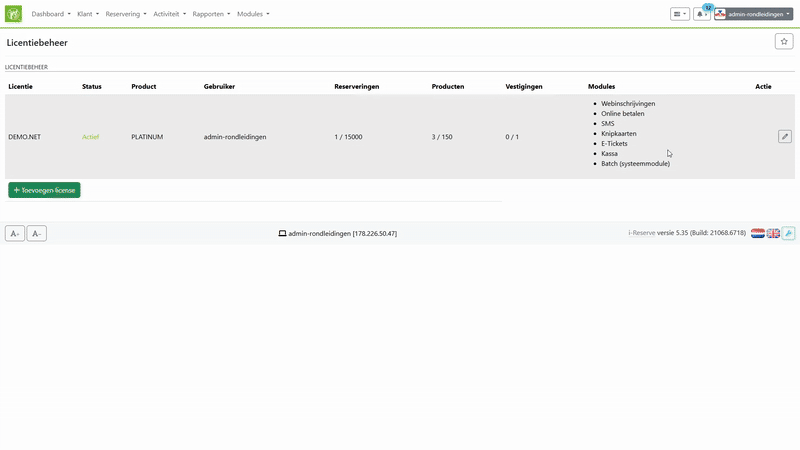
- Log in to the admin dashboard of your environment.
- Click your account name in the top right corner. This will open a dropdown menu — click the item for license management and load the next page.
- On the license management page, under the “Modules” column, check if “E-tickets” is listed.
- If "E-tickets" is listed:
- The E-ticket module is installed and active in your environment!
- If "E-tickets" is not listed:
- It usually takes 5–10 minutes after activation confirmation for the e-ticket module to appear.
- If the module still hasn’t activated after that time, you can revalidate your license. Click the edit button with the pencil icon on the right, which opens a dialog containing a revalidate button. Click that button and refresh your license.
- Refresh your browser using CTRL/CMD+SHIFT+R to see the updates.
- If "E-tickets" is listed:
Create the e-ticket templates
Your e-tickets are generated in your templates. Create a new template or edit an existing one to ensure your customers receive the e-ticket.
Want to know how to create or modify templates? Click here to go to the template setup guide.
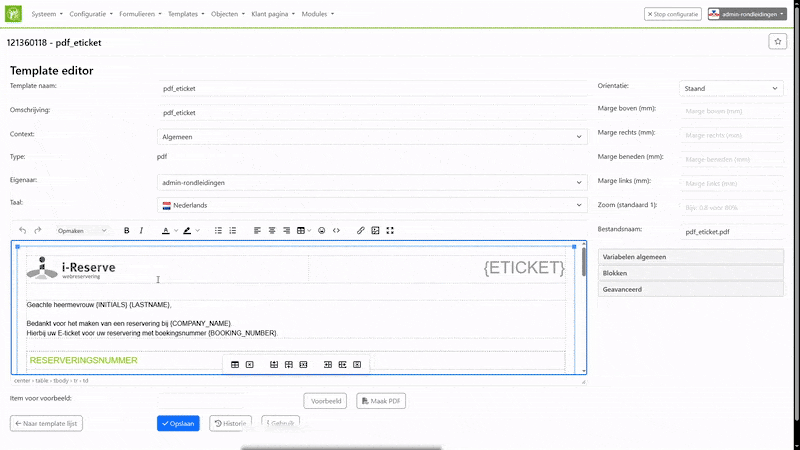
In i-Reserve, e-tickets are not automatically generated in your templates. To make sure e-tickets are automatically generated in emails or PDFs sent to your customers, you can follow these steps:
- In Configuration > Templates > Templates, open the template where you want to generate the e-ticket.
- In the template editor, add the following variable where you want the QR code to be generated: {eticket}
- To check if your e-ticket is generated, you can enter an existing reservation number under “Preview item” and click “Preview.”
Link your account to the Scanner App
The easiest way to validate e-tickets is via our Scanner App. Make sure you’re logged into the app with an account that has the rights to validate tickets.
There are two ways to create and send an e-ticket: automatically via a workflow or manually via the reservation dashboard.
Automatically create (and send) e-tickets
If you want to automatically generate and send an e-ticket, configure the correct PDF or email template within the workflow.

- Make sure your template can generate a QR code.
- Link the template to the appropriate moment in the workflow.
- As soon as the workflow is triggered, the e-ticket is automatically generated and sent to the customer.
Want to know more about workflows? Click here for the guide.
Manually create (and send) e-tickets
Would you like to generate an e-ticket yourself, for example to print or send later by email? Then follow these steps:
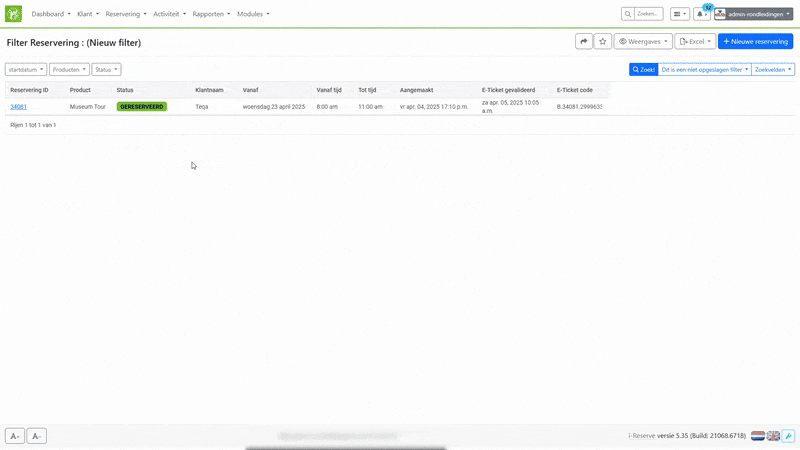
- Go to Reservation > Current Filter and open the desired reservation.
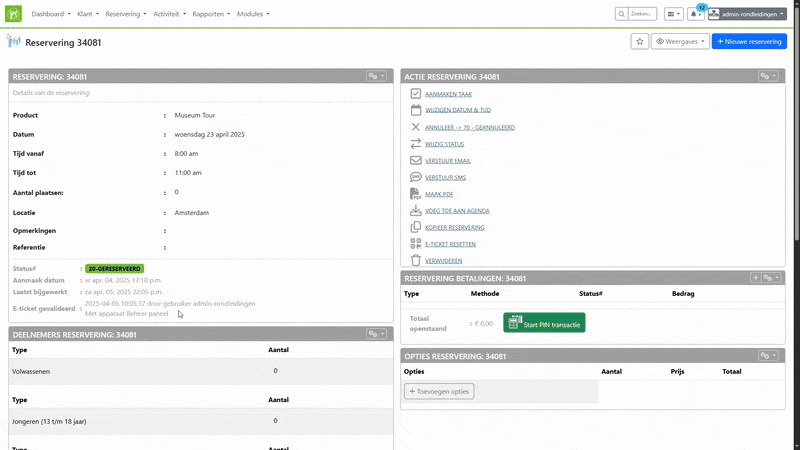
- In the RESERVATION ACTION block, click on "CREATE PDF".
- Select the correct PDF template where the e-ticket is set up and click "Create". The PDF will now be generated and downloaded.
- Do you want to send an e-ticket by email? Then click on "SEND EMAIL" in the action block, select the correct email template with e-ticket, and click "Send" or "Edit and Send".
What does the customer receive?
- With a PDF template, the customer receives an attachment containing the QR code.
- With an email template, the QR code is either displayed directly in the email or added as a PDF attachment.
- Note: QR codes in emails are only visible for 30 days. Use a PDF if you want to ensure long-term access.
An e-ticket contains a unique QR code that is valid only once. Once the code is scanned, the corresponding reservation is automatically validated. There are two ways to scan:
Scanning via the Scanner App
With the app, you can quickly and easily scan e-tickets on the go — for example, at the entrance or on-site.
- Download and install the app. Click here for instructions on setting up the app.
- Log in with your account.
- Click "scan" and point your camera at the QR code on the e-ticket.
If the scan is valid, you'll immediately see a confirmation of attendance.
Note: once scanned, a QR code is no longer valid.
Scanning via the dashboard (manual validation)
You can also manually validate an e-ticket from the reservation dashboard:
- Open the reservation for which the e-ticket was created.
- In the RESERVATION ACTION block, click on "USE E-TICKET".
- The reservation will then be marked as ‘validated’.
After creating an e-ticket, you can easily check whether the ticket is active and whether it has already been used (validated). Below you'll find how to verify this:
How to check if a ticket has been created?
E-tickets are automatically generated when a reservation is created, provided a correct email or PDF template is linked.
Do you want to check if the QR code is visible in the template?
Then use the "Send email" or "Create PDF" option in the reservation to generate a preview.
How to check if a ticket has been validated?
Open the reservation in the dashboard.
Under Reservation Details you will see the field "E-ticket validated".

-
If it says "Not yet validated", the ticket has not yet been scanned or used.
-
After a valid scan, this status will automatically update to show the date and user who validated it.


